How to build a wiki for your design team
Consistency is key for design teams. With Notion, you can build a wiki that brings together all your design team’s most important information, from style guides to process docs — so everyone on your team is executing off the same playbook.
- In this piece, you'll learn
- Here's why your design team needs a wiki
- Setting up your design wiki
- 1. Make a page
- 2. Nest sub-pages inside a page
- 3. Structure your pages
- 4. Many types of content for design teams
- 5. Make your wiki even more visual
- Notion for design agencies
- See it in action
- Next steps
Strong brands are built on strong design.
Setting that foundation requires consistency — your design team must operate using consistent tools, whether it’s a set of process documents, fonts, logos, or HTML color codes. Like a fingerprint, these assets should be the same everywhere your brand touches.
A wiki is your design team’s workshop. Yes, it’s a place for all the tools your team needs to do excellent work. But it’s also a place to initiate new team members into how you work. It’s a place to archive past explorations, iterations and decisions. It’s the fulcrum between design and every other team at the company.
Here, we’ll walk you through building your own design wiki in Notion (you might call it a knowledge base), and how it can unlock a better workflow for your team.
In this piece, you'll learn
- 1
How to create a wiki for your design team, step-by-step
- 2
How to customize it to match your team's needs
- 3
How to use features and integrations that are useful for design specifically
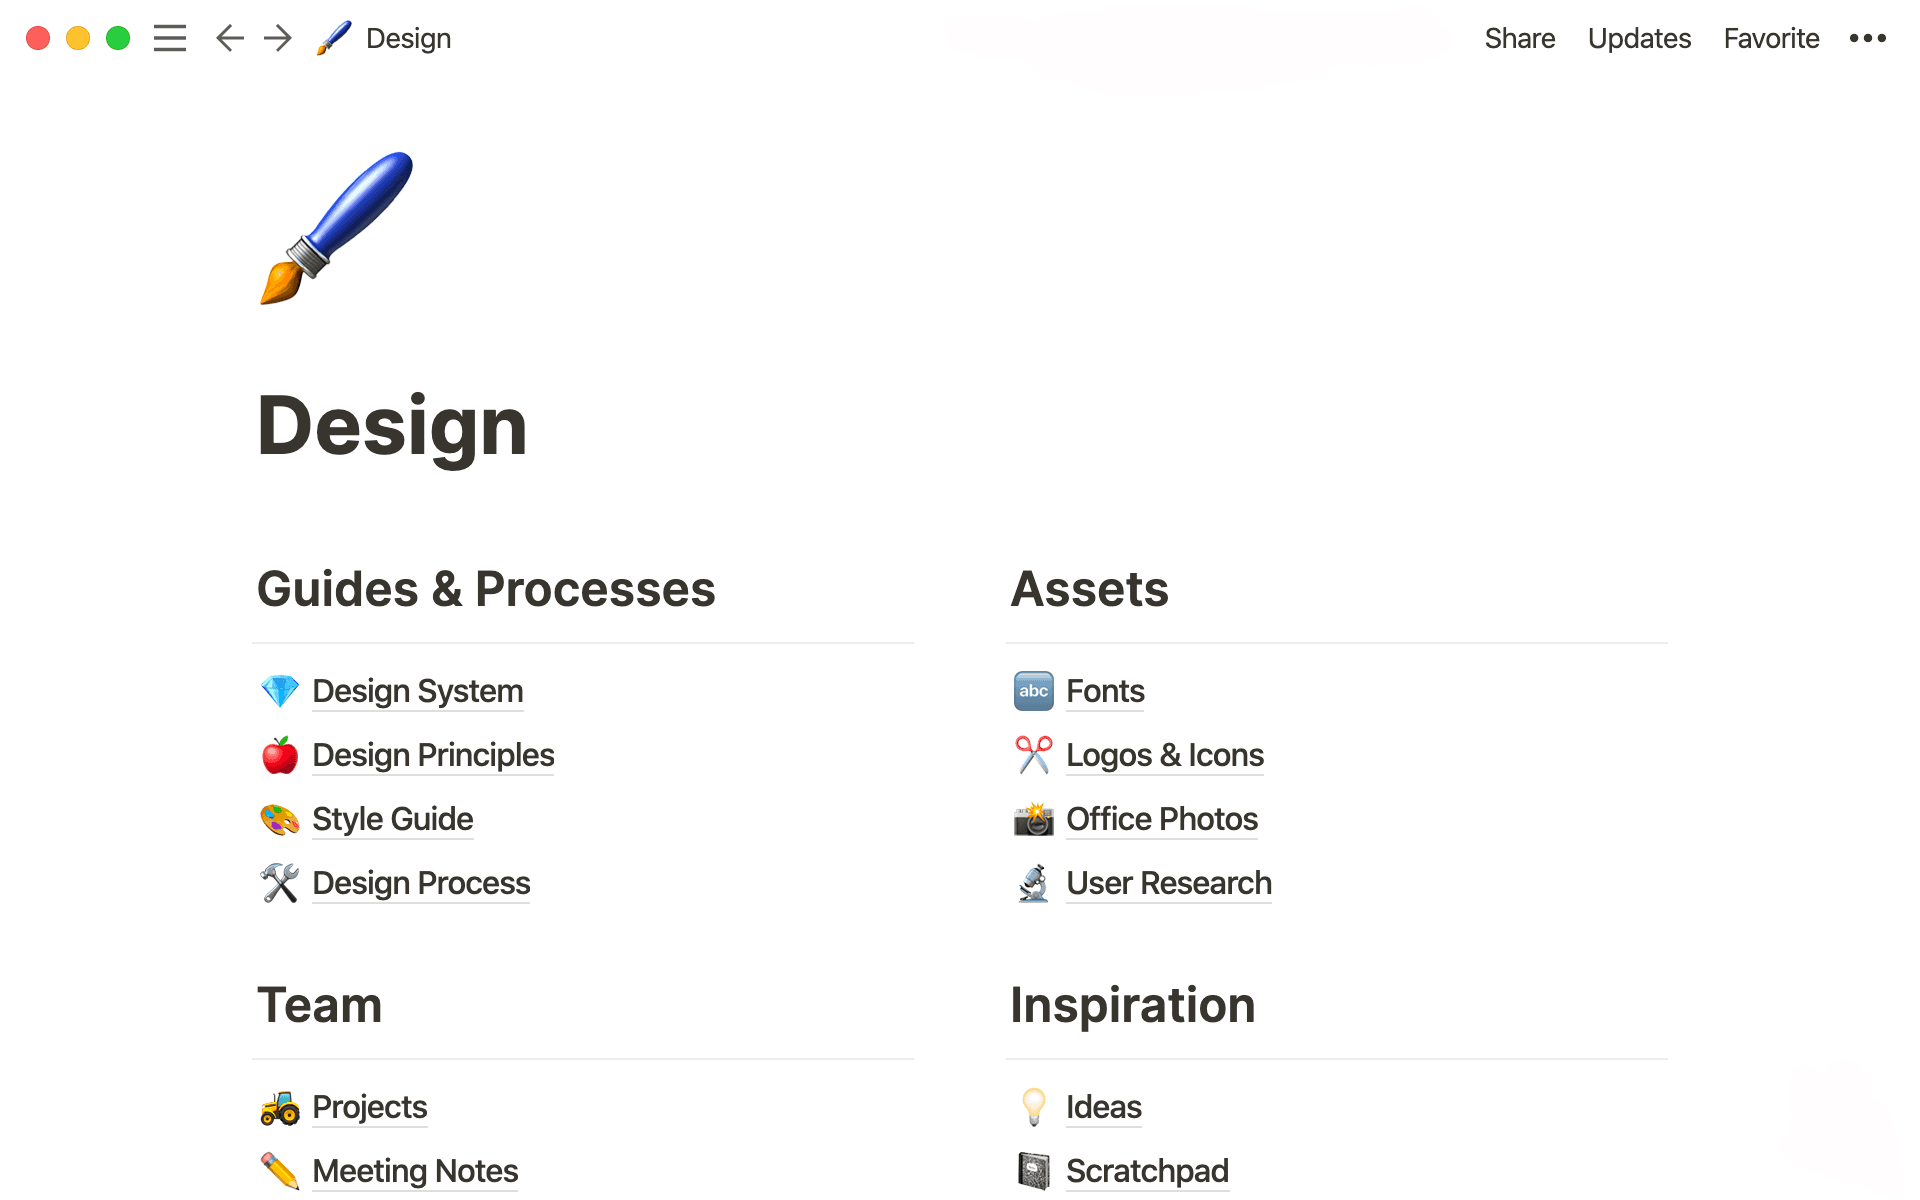
Here's just one example of what your finished product could look like:
Design work is a symphony of many instruments. The right typography. The right image. The right color (for the record, it’s #030303, not #00000). If these assets are scattered around different apps or software, your team lacks a central source of truth, turning beautiful music into dissonant noise.
Your design team deserves one reliable resource for:
The important assets needed for your team to get work done — correct images, style guides and more, all up-to-date.
Onboarding resources for new designers to help get them on the right track and contributing quickly.
Pages specific to the projects you're working on (or if you're at an agency, client-specific pages), so everyone knows who's working on what and can get all the context they need.
No wiki means inconsistent work — and when design work gets inconsistent, you end up diluting the brand you’ve worked so hard to build. But it’s not just the brand that suffers. Process suffers. You’ve established a system that works for you and your team, and if it’s not documented and accessible, that process won't get followed. At best, this slows everything down. At worst, it creates costly chaos.
One hub for everything creates a culture of self-service, allowing the product team or the marketing team to access things they’d typically have to ask a designer for. Imagine how much time you’d save if someone from sales could pop into your wiki and quickly find the correct logo they need for a pitch deck.
A design wiki isn’t just important for your team. It’s important for the entire company.
Let’s start with the basics and work our way up from there.
1. Make a page
Almost everything you do in Notion starts with a page. Your design wiki will be a page that you'll add other pages to. These pages can contain just about anything — text, images, videos, databases and more.
To make a page, click the + button next to WORKSPACE on your left sidebar. If you're already inside of a page, hit / and type page, then press enter.

Your sidebar just got better
While the information presented in this guide is still useful, some elements of the sidebar have been updated — making sharing with the right groups easier. Learn about how teamspaces give every team a home for their important work.
Whenever you type /, you'll see a dropdown menu full of content options — we call this a "slash command." And as a designer, we think you'll end up using the slash command a lot to add different types of content to your pages.

Templates can help get you started
2. Nest sub-pages inside a page
The beauty of having a wiki is that it can contain main pages inside of it.
That means you can have a page just for brand assets. You can have another for style guidelines. You can have one for team meeting notes, one for inspiration and even one that's a list of your favorite designers everyone should follow on Twitter.
Each of these pages becomes a resource for your team or anyone who needs design materials, for that matter. And everything will be in one place, so you can spend less time searching high and low for the right files.
Remember that, to make a page, you can type
/pageand press enter. Your new page will pop up, where you can give it a title and add any content. You can even add some personal flair to your pages by selecting the perfect emoji or cover art.If you'd like to create many pages at once, you can list all of the pages you want to make as text. Select them all, then click the
⋮⋮icon, which appears when you hover over the selection. Then clickTurn Intoand choosePage.
Setting up a home for all your information obviously helps your work, but there are other downstream benefits to be had, too.
Onboarding a new designer will never be so easy — they'll have your core design philosophies, documents, iterations and assets collected from day one. They can more quickly get spun up and start doing meaningful work since they have all the tools immediately. And they have this repository of information to return to whenever they need to understand past decisions and how to approach new projects.
With all assets centralized, keeping them fresh is simple. Instead of updating them several places, you can do it once in Notion. Nothing slips through the cracks because no cracks exist.
You and everyone on your design team know where the single source of truth is.
You can even add some personality to your pages
3. Structure your pages
Now, all your vital design information lives in your wiki. Let’s organize these pages a bit so you and your team can quickly and easily find whatever you need.
We’ve found that headers are the best way to organize a wiki’s pages.
Using
/again, select fromH1(the largest),H2orH3(the smallest) headers.Now you can use the drag-and-drop feature to nest pages under the appropriate headers.
You can also use drag-and-drop to create columns. Grab the
⋮⋮icon next to your header and drag it all the way to the right to create another column. The blue lines will help guide you.To add divider lines under your headers for a clean look, type three hyphens in a row.
And finally, use
⋮⋮to grab any pages you want and drag them into the sections where they belong.
Every design team is different, and with Notion, you can customize your wiki based on your team’s needs.
A Brand Assets section might include pages for "Fonts," "Logos," and "Office Photos." All of these pages can contain the most up-to-date assets, so anyone on your team can use them.
A Resources section could have pages for "Style Guide," "Design Process" and "Tools." This way, anyone on your design team (new or old) can follow the same process and execute consistent work. They can also contribute to your existing processes, using their learnings to help the entire team.
Structuring your wiki like this empowers anyone to find the information they need without disrupting the deep focus of their fellow designers.
Instead of constant pings in Slack, the wiki becomes the starting point for all design questions.
4. Many types of content for design teams
Notion is like a designer's playground. We've got a shed’s worth of tools that are unique to designers, so you can stop working with rigid software that doesn't meet your needs.
Within pages, you can embed different types of content and display them however you want. Hit / to see some of the things you can put right into pages, which include:
Images, videos & gifs
PDFs
Figma files
Invision projects
Framer prototypes
Whimsical boards
Miro boards
Loom videos
Abstract projects
You can type / and select from the display menu, or start typing the name to bring them up faster and press enter. For example, /pdf and /figma.
With these tools, designers can turn any page into a visual expression of their work. Next to an image might be a toggle that discusses the design process. Next to a video might be a checklist of things you need to review when providing feedback. You can comment and tag other designers to notify them of changes, review cycles and more.
And now, everything in your design organization has a central place. Stop context-switching and bouncing between tools and tabs — Notion can be your hub that connects everything, so information doesn't get stuck in scattered apps.
No other tool fuels the symbiotic relationship between your work and your wiki like Notion does. Instead of your work existing on a single plane, it’s like Notion makes it three-dimensional.
Want to learn everything about comments and discussions in 4 minutes? Watch this.
Uh-oh! It looks like your ad blocker is preventing the video from playing.
Please watch it on YouTube

5. Make your wiki even more visual
Your wiki doesn't have to be a collection of pages. It can also be a database, or use databases.
A database is a simple tool to structure and organize information in a variety of ways. To see all the different types of databases you can make, use the slash command. Type /database and you can choose from there. But for now, we're focusing on building a Gallery.
To make a gallery inside of a page, type
/gallery.Treat the cards inside your gallery like any other page you create — they can contain any information you’d like.
The benefit of a gallery is that you can display the information visually. You can even choose what image you’d like shown on the card, the size of the card and more.
For instance, the card for “Tone & Voice” might contain design principles and guidelines. The one for “Icons” will hold icon files and past iterations and explorations. The “Typography” page can house font files and even web embed codes to put those fonts into action. And all of these will put images front and center, while still having all the necessary information you need.
Once you’ve created the gallery’s pages and included the correct information, you can choose what you’d like to display on the card by hitting the ••• menu button on the top right.
Here, you'll see a button for Properties. Select it, and inside, you can pick what information you'd like displayed on the card when it's in the gallery view. Click Card preview and choose between Page content (the image you put inside the card) or Page cover (the cover image).
Notion helps you put your work on the front page, and it’s customizable enough so that you have the power to decide how it’s displayed.
Notion for design agencies
When sharing design work with a client, you want to make sure it looks polished, and you want to make it easy for them to provide feedback. They shouldn't have to jump around tools they might not be literate in, or need to bounce between your work and the project spec to ensure it's being executed correctly.
Notion is flexible enough to serve as the home for all your client work and as a presentation tool.
Each client can have their own page. And within that page, each project can have its own page. Here, you can keep all the necessary documentation, images, and background context for that project. You can include a log of meeting notes and docs explaining how decisions got made. This inspires collaboration and makes for a better give-and-take with a client. They can tag you in feedback and make comments without needing to leave the page.
To share a page with a client, hit
Shareat the top right.On a Team or Pro Plan, you can invite them as a guest to their own page with their email.
Or, as long as they also use Notion, you can turn on
Share to the web, and thenAllow editing. Anyone you share the link with will be able to edit and add comments.
Let's say you want to show off your design work in Notion in pure presentation mode before letting a client dig in. You could turn on just Share to the web. This publishes the page on the internet so that anyone with the link can see it, but not comment or edit.
Notion is the one place that brings together all the different pieces of your work with all the different people who matter — presenting it in a way that lets your design shine.
Uh-oh! It looks like your ad blocker is preventing the video from playing.
Please watch it on YouTube
Visual learner? We created a 7-minute video showing how to build a basic wiki:
Uh-oh! It looks like your ad blocker is preventing the video from playing.
Please watch it on YouTube
A structurally-sound wiki can be the foundation for your design function — for executing work, maintaining consistency and growing your team.
A wiki isn't only a collection of current work. It's a repository of past learnings. It's a place for brainstorming what's next. It inspires creativity and collaboration among design teams, but also company-wide. It's is your home for everything design-related, so you can focus on building an iconic brand.
Your design wiki is an investment in that brand. We hope this guide helps you along the way.


Something we didn’t cover?