Enterprise connection settings

Enterprise connection settings empower workspace owners with granular control. Manage member access, approve connections, and streamline your Notion workspace's integration ecosystem — all from one centralized dashboard.

Note: This feature is only available to users on the Enterprise Plan.
Workspace owners on the Enterprise Plan have access to additional settings for managing connections within the workspace.
If you're a workspace owner, go to
Settings→Connections.Under the
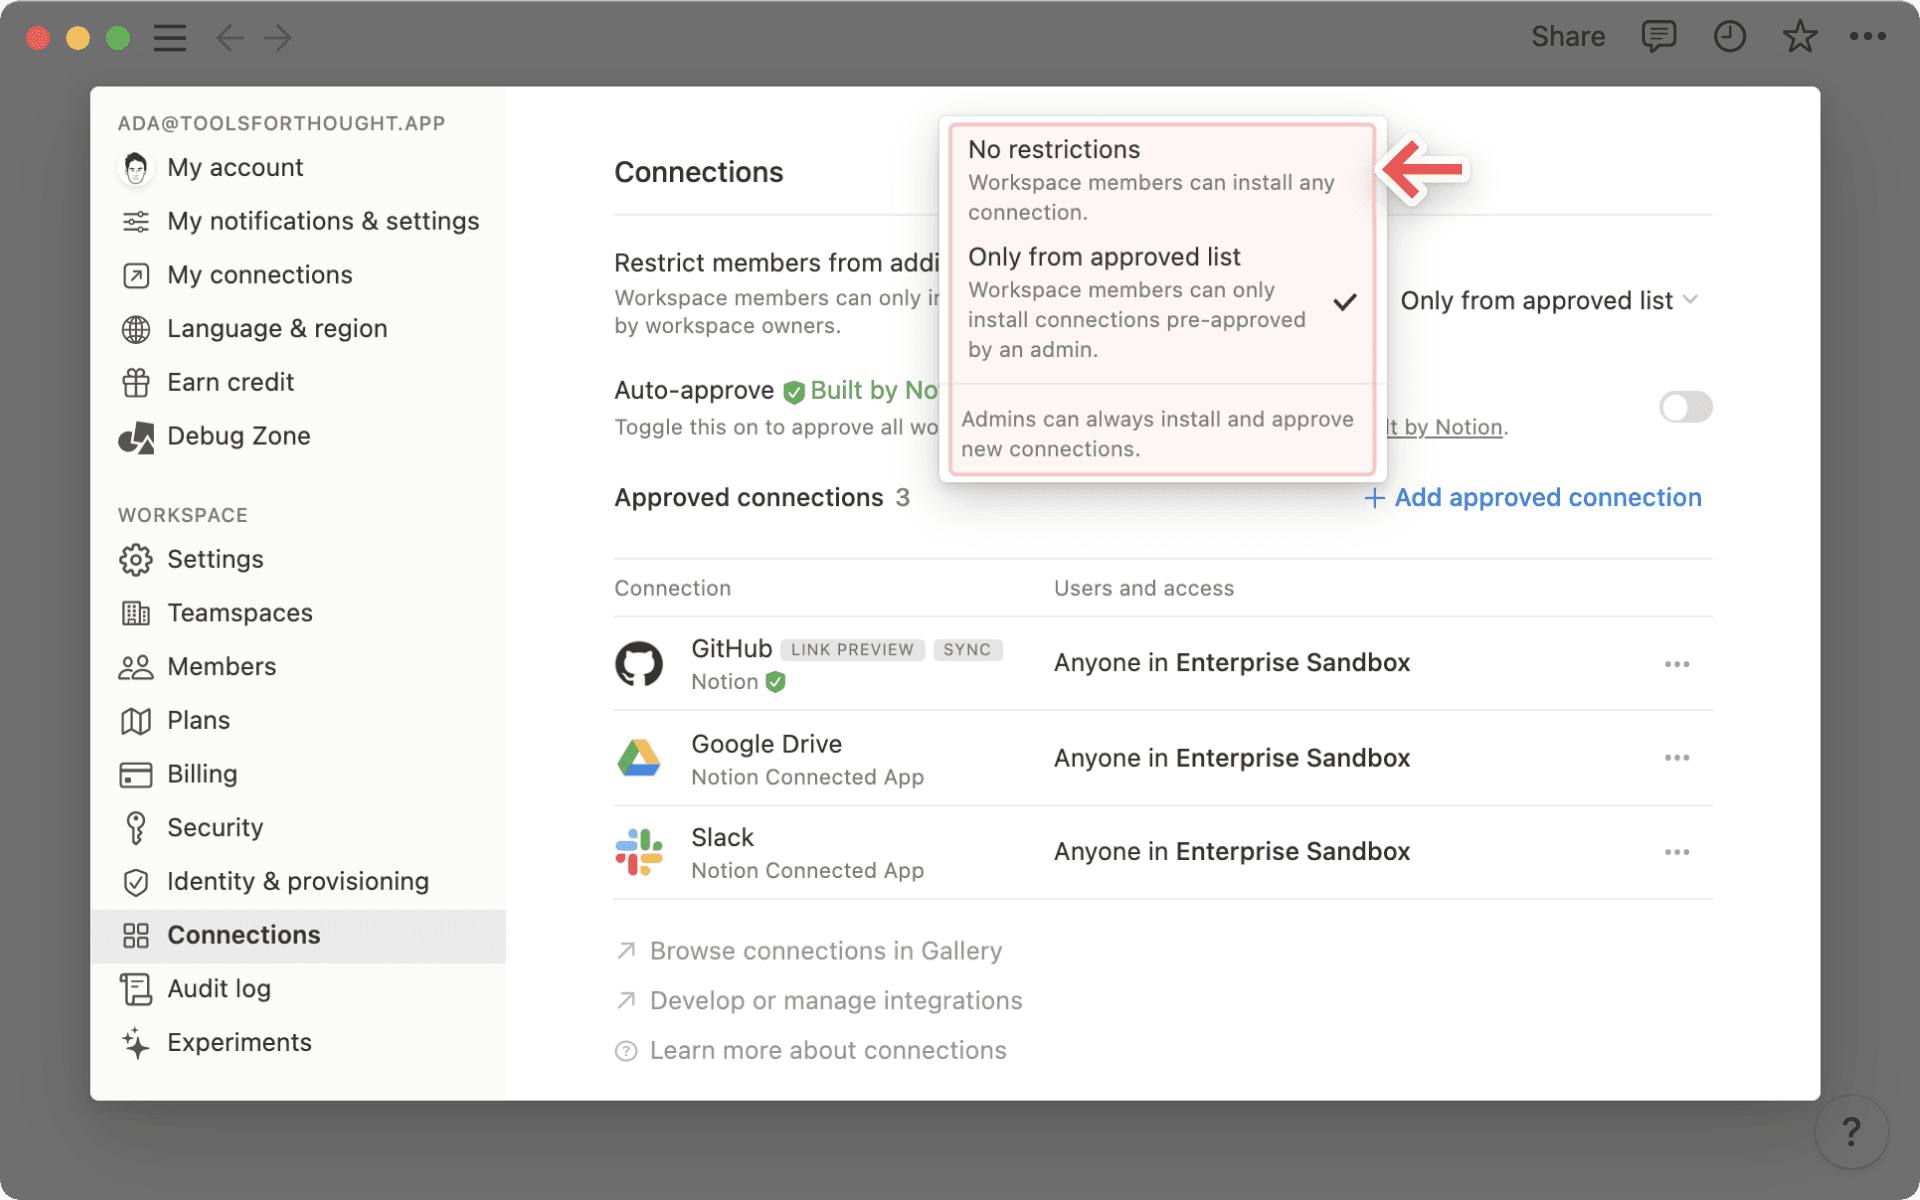
Membertab, you'll see the option toRestrict members from adding connections. Click the dropdown to the right to access two options:No restrictions: All workspace members can install any connection in the workspace.Only from approved list: Workspace members can only install connections pre-approved by a workspace owner. If a workspace owner installs an integration that isn’t already on the approved list, it’ll automatically be added to the approved list afterwards.

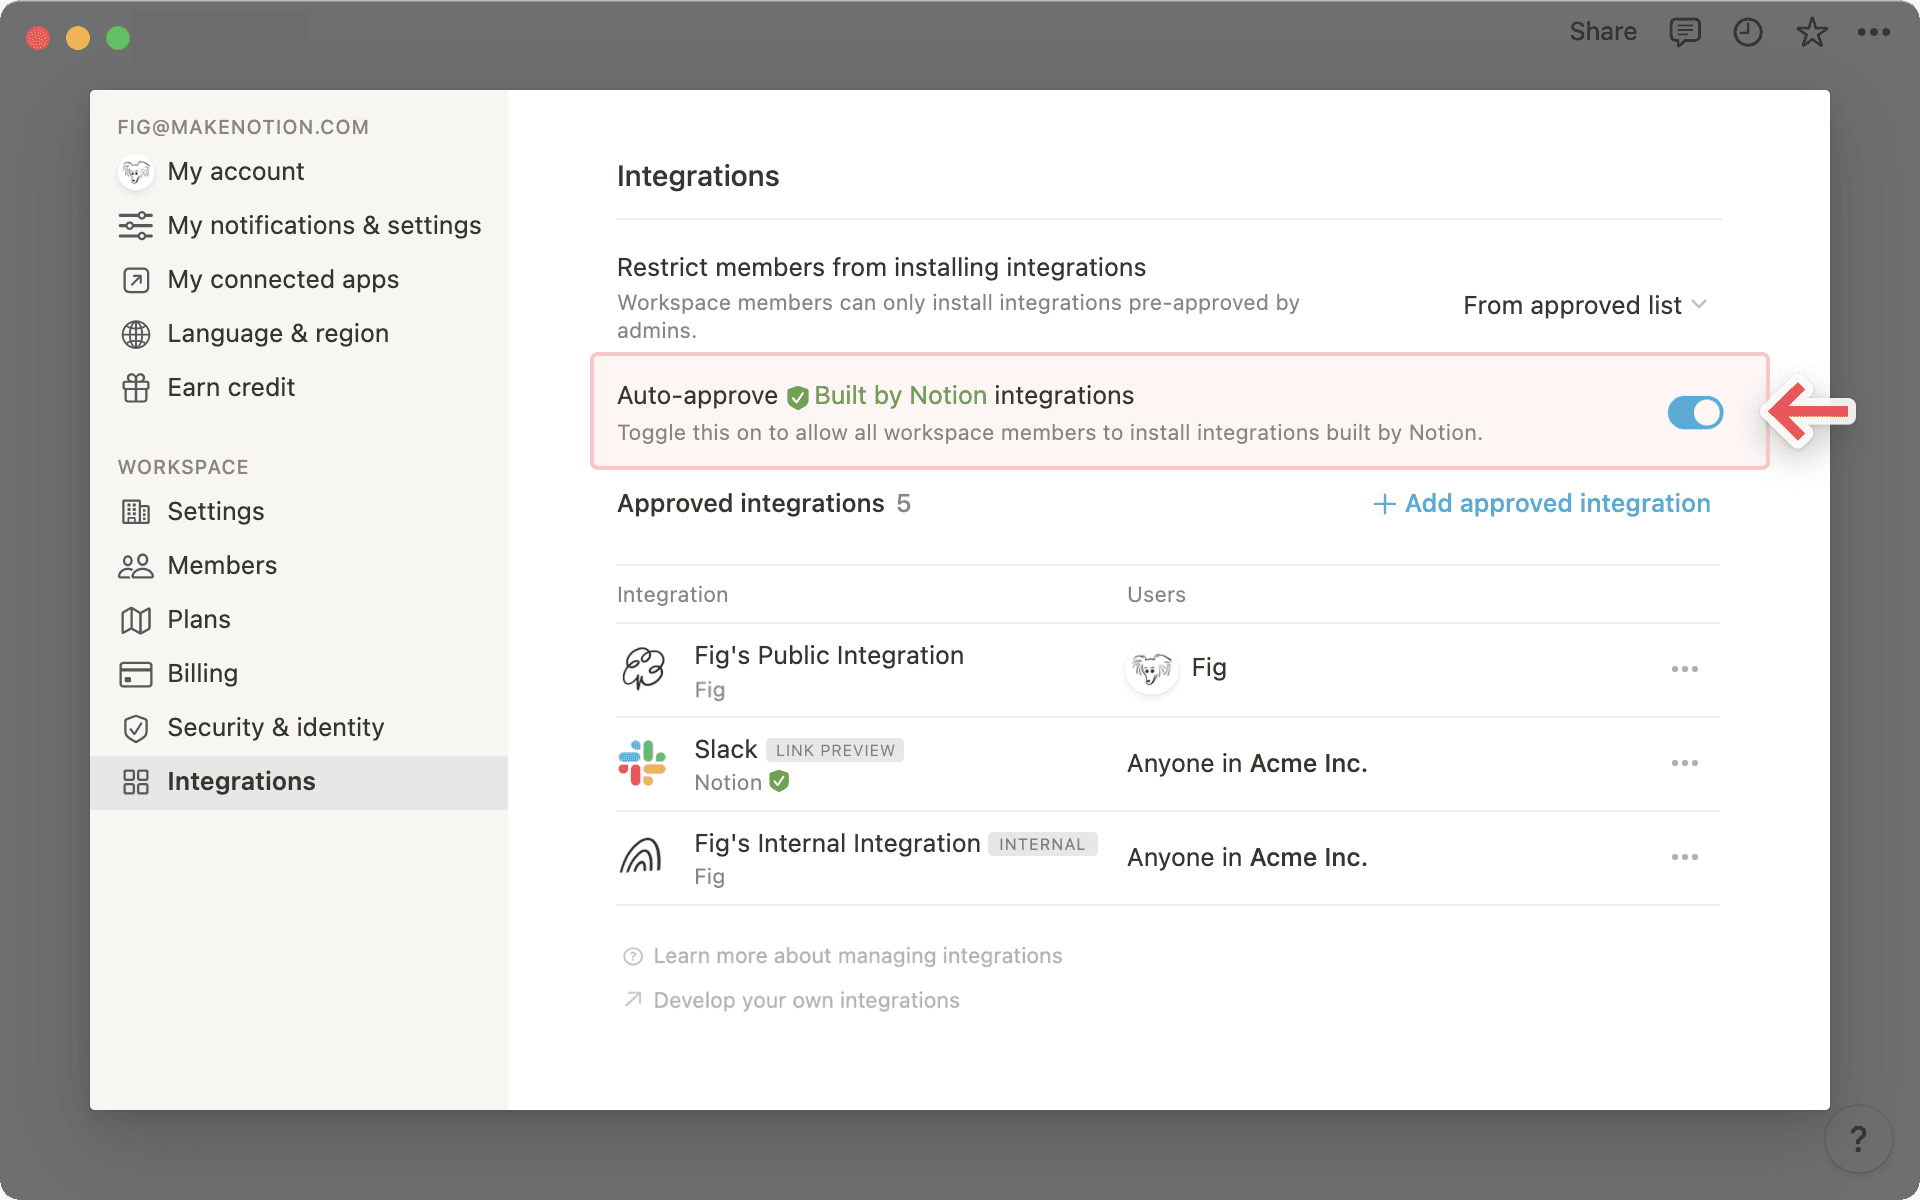
Auto-approve connections built by Notion
If
From approved listis selected, workspace owners will see an additional option to auto-approve connections that are built by Notion. See the full list of these connections here →

Approved connections list
Click the
+ Add approved connectionbutton to approve additional connections for members in your workspace.
Note: Before you can approve a connection for the rest of your workspace, you or another admin will have to install it first! Only connections already installed in the workspace will show up in the
+ Approved connectiondropdown.Instructions for installing connections are specified below.
Under the
Approved connectionsheading, workspace owners will see a full list of connections that have been approved and installed in the workspace.To the right of each connection's name, the name(s) of the users who have installed the connection in the workspace are listed.
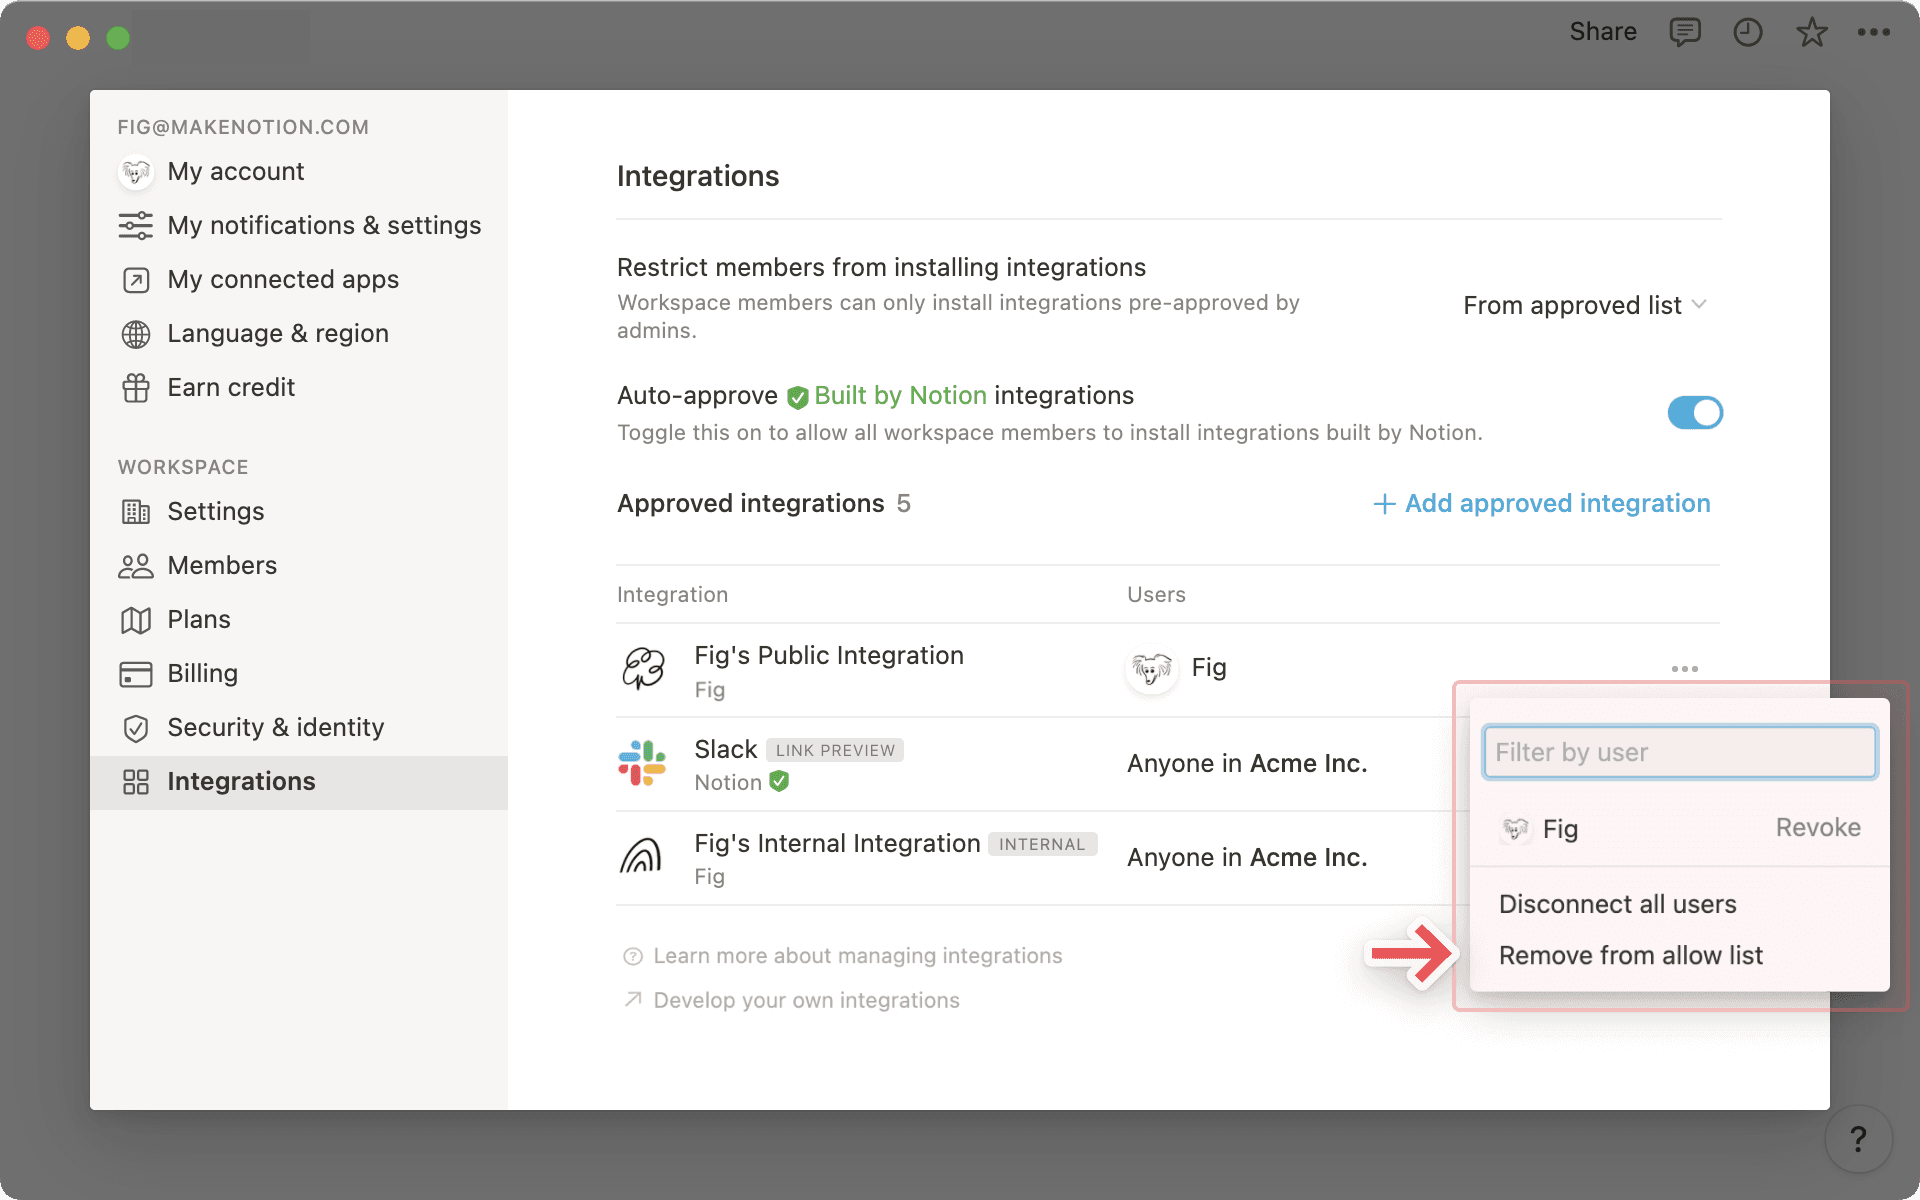
Click the
•••menu to:Filter by user.
Revoke specific users' access to a connection.
Disconnect all users.
Remove the connection from the approved list.

Workspace owners on an Enterprise Plan can also disable the Send webhook action for your entire workspace. Learn more about webhook actions here →
To turn off webhook actions for your workspace:
Go to
Settingsin your sidebar.Open the
Connectionstab.Toggle off
Allow webhooks in automations.
Once you’ve turned this feature off, members of your workspace won’t be able to select Send webhook as an action for any automations they set up.
